How to install Let’s Encrypt certificate behind Cloudflare
3rd October 2018Goals: Install Let’s Encrypt certificate in a hosting provider that doesn’t support Let’s Encrypt installation through cPanel.Serve behind Cloudflare with additional free ssl.
Cloudflare is a Content Delivery Network that will speed up your site,save you on bandwidth cost and offer superior protection even in the free plan, acting as a reverse proxy.It offers free SSL and combined with Let’s Encrypt certificate will legitimize a site and improve its ranking. In order for a site to gain the secure lock, serving visitors pages only with a universal free ssl from cloudflare is not enough,from your side you will need a certificate installed.Many shared web hosting providers offer Let’s Encrypt integraded in their admin panel,others need manual installation by cli.This tutorial is based on hostinger which needs manual installation by the web site owner.
Step 1
How to use Cloudflare’s DNS:
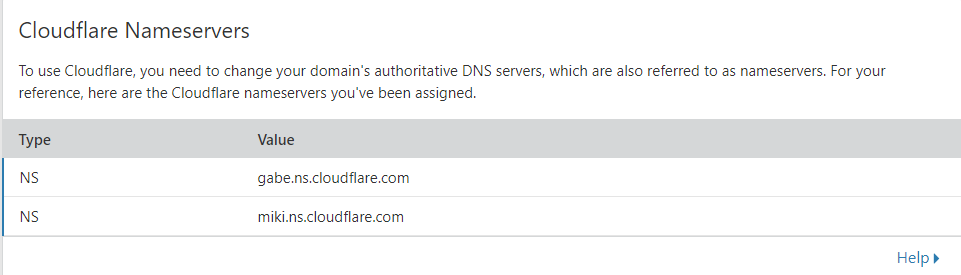
Our site is being resolved by the nameservers of our hosting provider,these needs to be changed to cloudflare’s nameservers so the visitors can pass through Cloudflare network to reach us.After registering a site in cloudflare we are presented with their nameservers which need to be entered into our providers Admin panel.
In Cloudflare Panel go to DNS tab

On the DNS records part we choose which records/parts of our site will pass through cloudflare by pressing on the cloud icon.We need to select at least our main records that visitors will hit.


Just below we can find cloudflare’s nameservers that need to use to replace our hosting providers current dns.
Login to the providers admin panel.In this case we’ll use hostinger and we need at least a premium account, it’s the second cheapest and offers a free domain so not a big deal.
In the Dashboard go to Advanced and DNS zone editor.

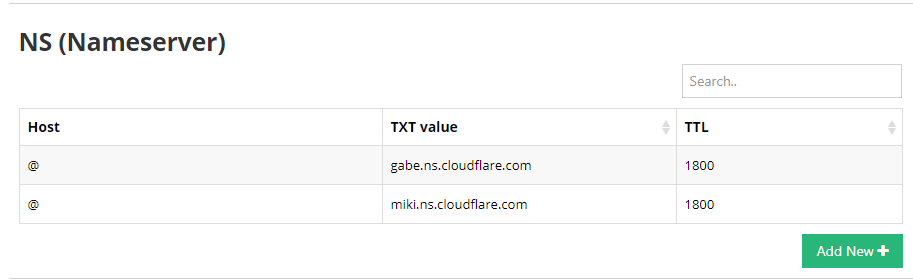
Inside the DNS Zone Editor scroll down to NS(Nameserver).There we will find four entries , we edit the first two and replace them with the two name servers of cloudflare, and delete the other two.Result should be this:
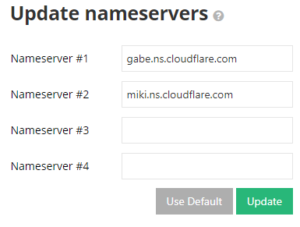
Go back to Dashboard/Domains and select Domain management:

Now update the nameservers.Should look like this:
Now we need to wait for some hours until the new dns entries propagate to the network.We are done when we see in the Cloudflare dashboard Overview tab the green status:

While we wait we are going to install a Let’s Encrypt certificate into our website.
Step 2
How to Install Let’s Encrypt Certificate:
In our example Hostinger doesn’t offer installation of Let’s Encrypt through cPanel (they do offer cheap ssl’s with one time payment) so we need to do this manualy through cli.For this we need ssh access to our server.
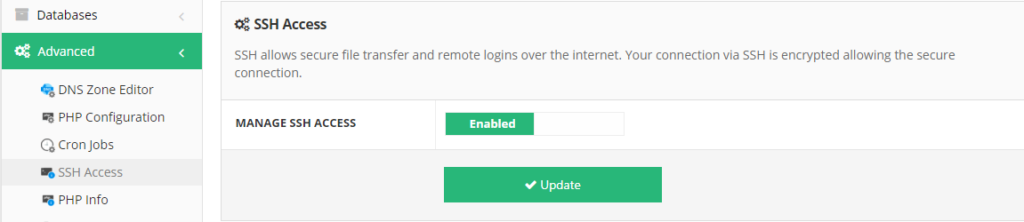
From the Hostinger Dashboard go to Advanced/SSH access.Enable the option Manage SSH access and press Update.
After a refresh the login information for accessing the server through ssh will be presented.Our ssh password is the same as the FTP password which you most likely do not know so you need to go back to Dashboard/files/FTP accounts and at the place that says Forgot your FTP password? change the pass and keep it somewhere.

Now login into your server through an ssh client like Putty or through linux cli:
ssh SSH_username@SSH_ip -p 65002Download ACME-client:
git clone https://github.com/kelunik/acme-clientAccess the newly created ACME directory:
cd acme-client/Download and install composer, a dependency manager for php:
php -r "copy('https://getcomposer.org/installer', 'composer-setup.php');";
php composer-setup.php;
php -r "unlink('composer-setup.php');";
php composer.phar install --no-dev
Now register an account with Let’s Encrypt and generate your certificate:
php bin/acme setup --server letsencrypt --email [email protected]
php bin/acme issue --domains yourdomain.net:www.yourdomain.net --path /home/username/public_html:/home/username/public_html --server letsencrypt
In the result message we should see “succesfully issued certificate”.
Our ACME client created certificates and private keys.We need to copy and paste the contents of these files to our web hosting’s cPanel.
![]()
Go to the /home/username/acme-client/data/certs/acme-v01.api.letsencrypt.org.directory/domain directory and cat the fullchain.pem and key.pem files.
First do
cat fullchain.pemWe need to copy all of the content in the file which includes two certificates, and paste it in our desktop in a certificate.txt file.
![]()

![]()
Then do
cat key.pemSame again copy the entire file into another .txt in our desktop and name it key.txt.
Back in cPanel go to Advanced/SSL and in custom SSL select from the dropdown your domain,copy the contents of your certificate.txt in the CERTIFICATE:(CRT)* field and the contents of your key.txt in the PRIVATE KEY: (KEY)* field.Press Install.Upon completion we will be presented with a success message.
In the same page the state of the SSL is now visible

Do not force HTTPS if you are forcing it through your CMS, e.g Wordpress or you will cause a redirect loop.You can simply change the url of your site later inside WordPress.
Step 3
How to autorenew the Let’s Encrypt certificate
Let’s Encrypt certificates needs renewal every 90 days , so we need to create a cron job to automate the process.Fortunately web admin panels offer a cron section.
In order to check the expiration date ssh into our server , make sure we are placed at least to our username’s dir inside /home so we can call php
cd /home/username/and execute
php acme-client/bin/acme check --name yourdomain.net --server letsencrypt
Note that you can renew your certificate long before it expires,so we are going to schedule an autorenewal every two months.
Warning: In case of a failure to renew a certificate,regardless the error message,make sure to disable any firewall/security plugin installed,like WP Security. In most cases Let’s Encrypt fails to reply back to your server because of deny all rules applied to your .htaccess file by the security plugin.
Go to Advanced/Cron Jobs and create a new cron job.Select custom and input the command we used to generate the certificate previously:
php bin/acme issue --domains yourdomain.net:www.yourdomain.net --path /home/username/public_html:/home/username/public_html --server letsencryptcheck in the dropdown menus the time frames that suits you and press save.The command will be executed whenever you decided e.g every couple of months in the 1st:
Step 4
Final settings
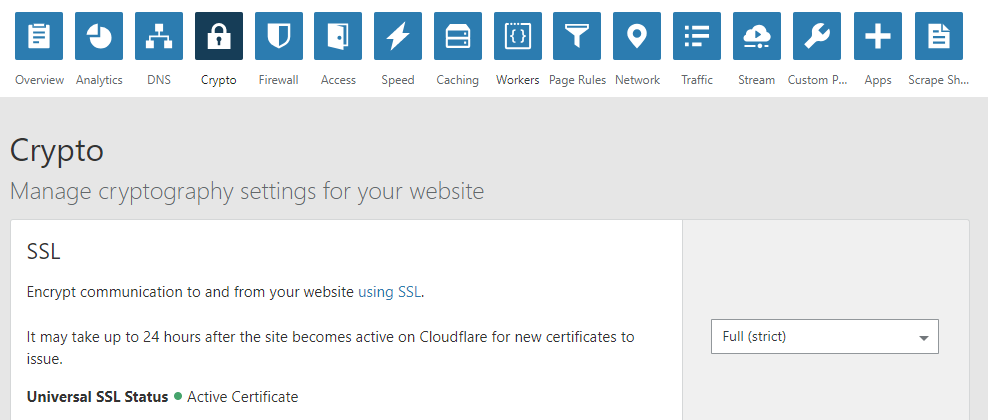
Login to the Cloudflare Dashboard ,in the Overview tab there should be a Status : Active.In the Domain Summary the SSL should be flexible.This means that even though the Lets Encrypt certificate is active in the site, visitors notice a not secure sign in their browsers.We need to go in the Crypto tab,and change the SSL to full(strict):
Note that in order to achieve an A+ rating in ssltest we need to enable in the same tab HSTS,with some considerations like the fact that if we stop using cloudflare the site will become inaccessible for a period of time.
Also in the same tab we should enable “always use HTTPS” so when visitors type http://yourdomain they get redirected to https.
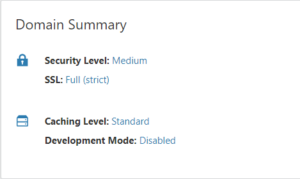
If we go back to Overview tab we can see that the SSL has changed to Full(strict)
Go to the CMS dashboard (in this case WordPress) and in Settings/General change the site’s URL from http to https.

Finally clear cache on the browser or open a new session to see your site in https.
![]()
![]()
Reference:
https://www.hostinger.com/tutorials/ssl/how-to-install-free-ssl-from-lets-encypt-on-shared-hosting
Edit: A better solution is described in How to install Cloudflare Origin certificate on Hostinger